Floor Plan
Use the floor plan to arrange tables and manage seating layout.
Where to Find It
Go to Venue Management > All Venues > Floor Plan.
What You Can Do
- Drag and drop tables into position
- Group tables into areas
- Adjust layout for events or busy periods
Manage Your Floor Plans
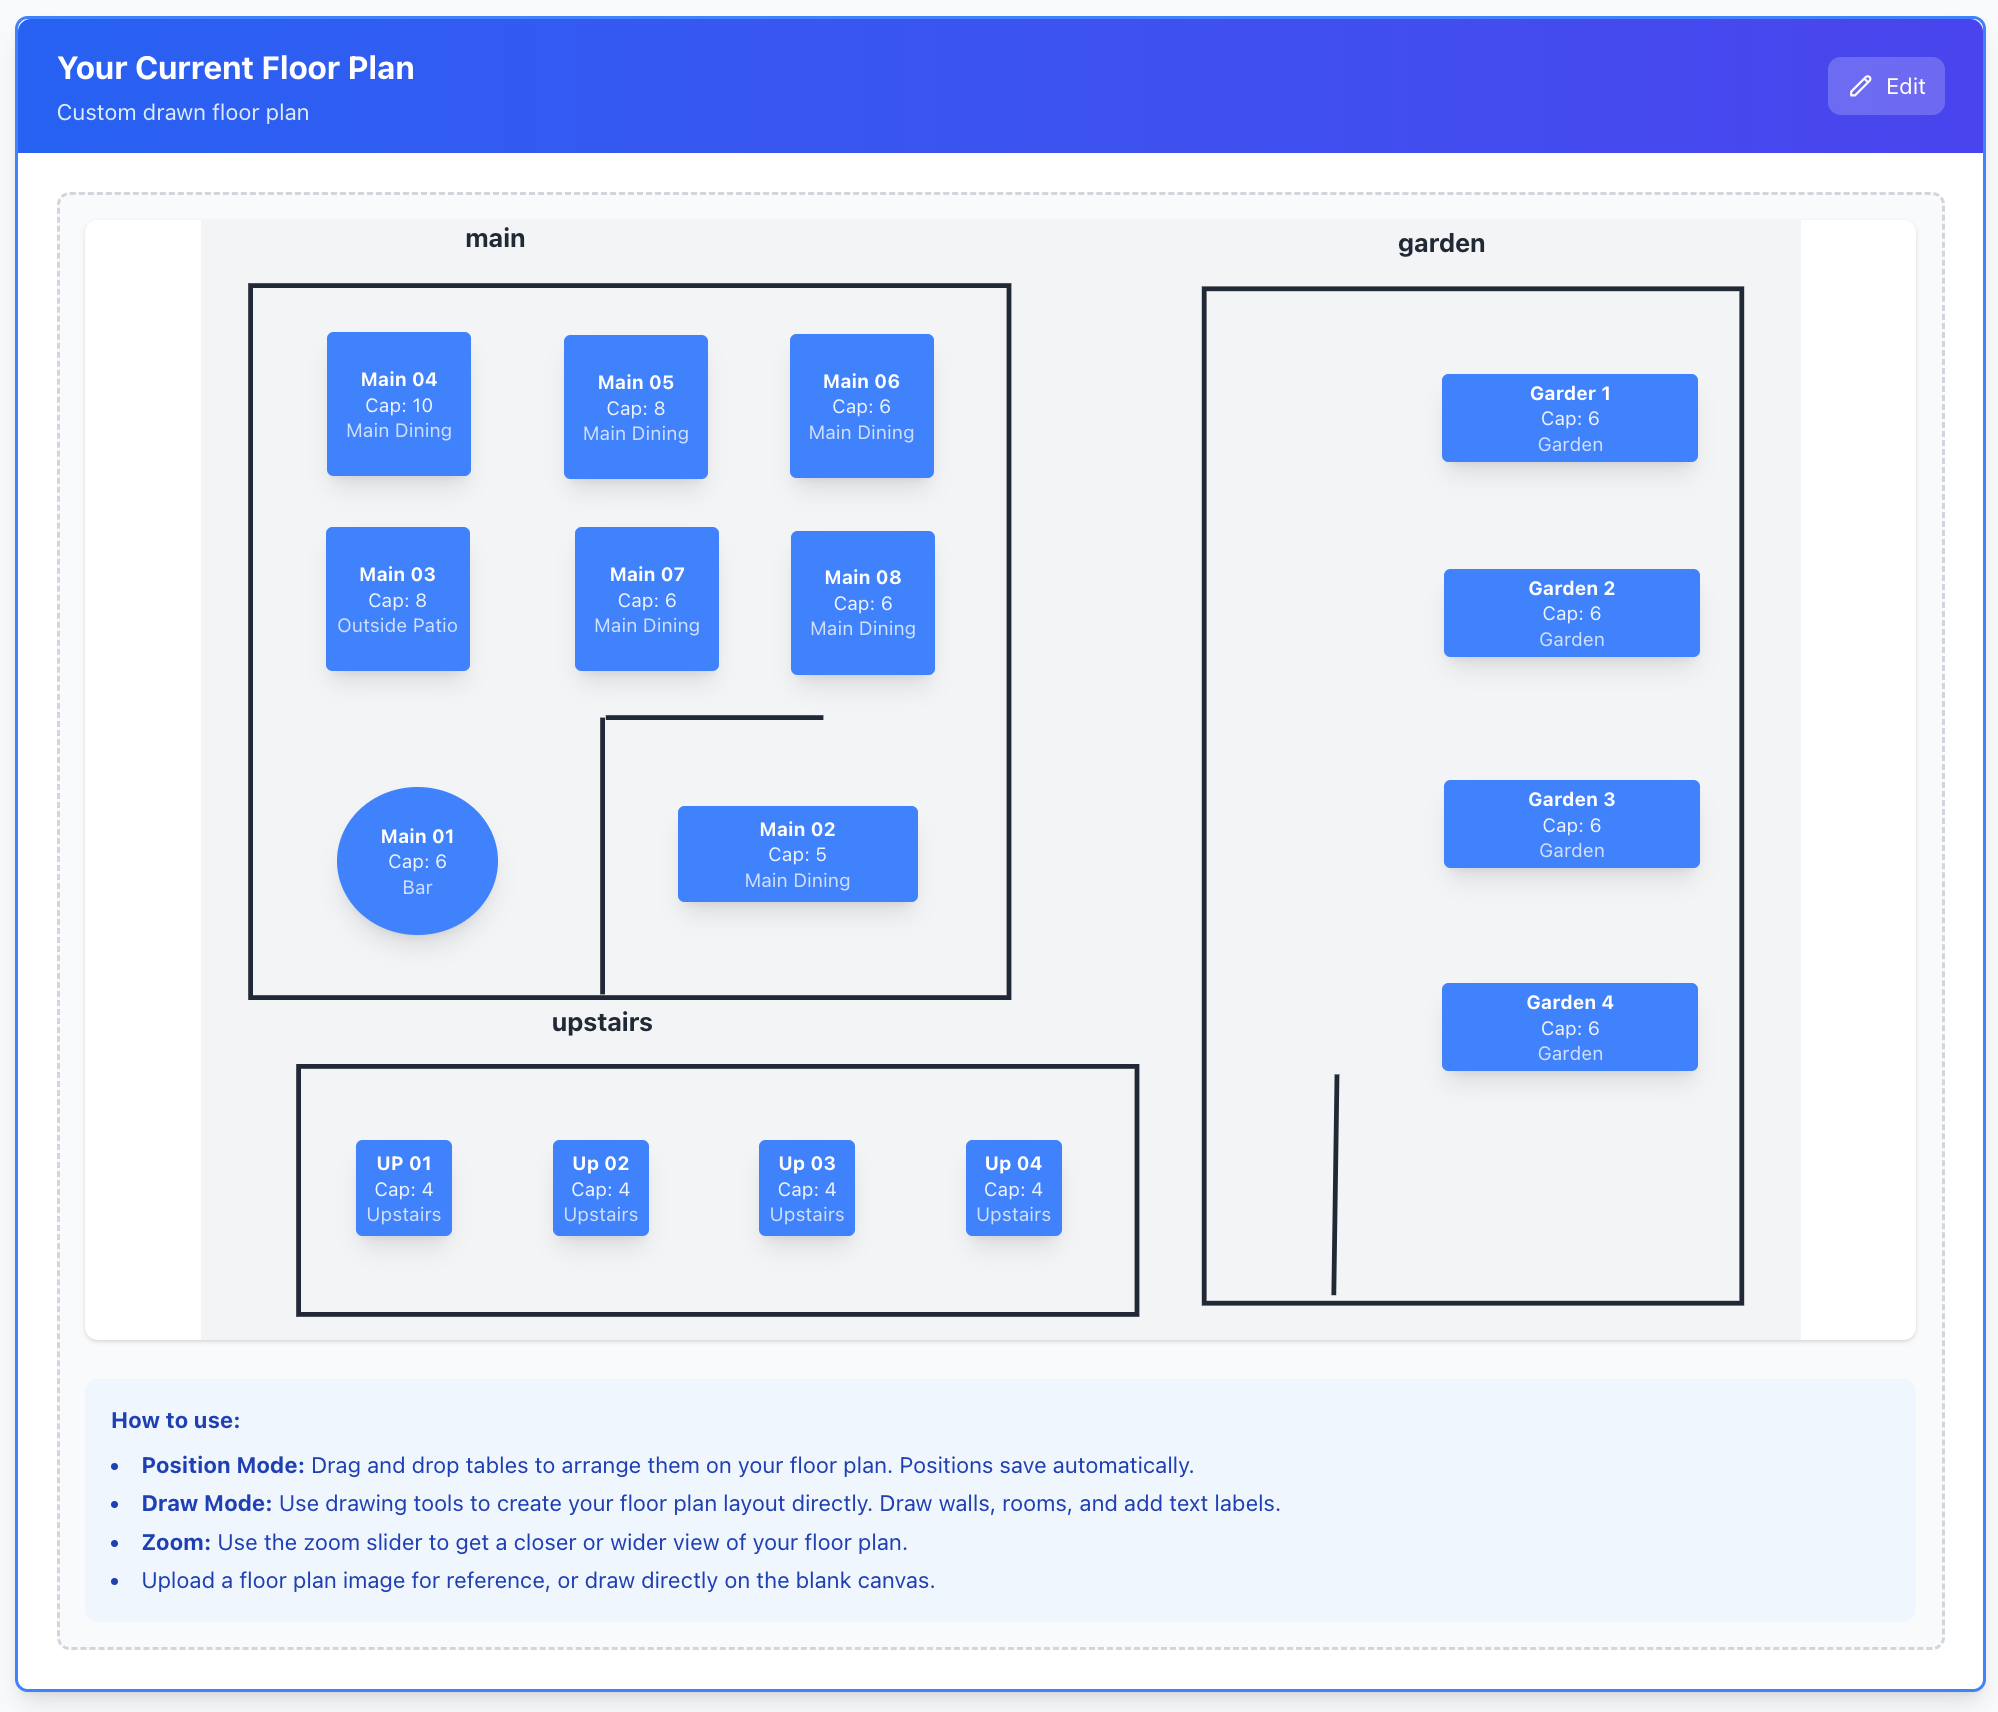
Floor Plan Overview
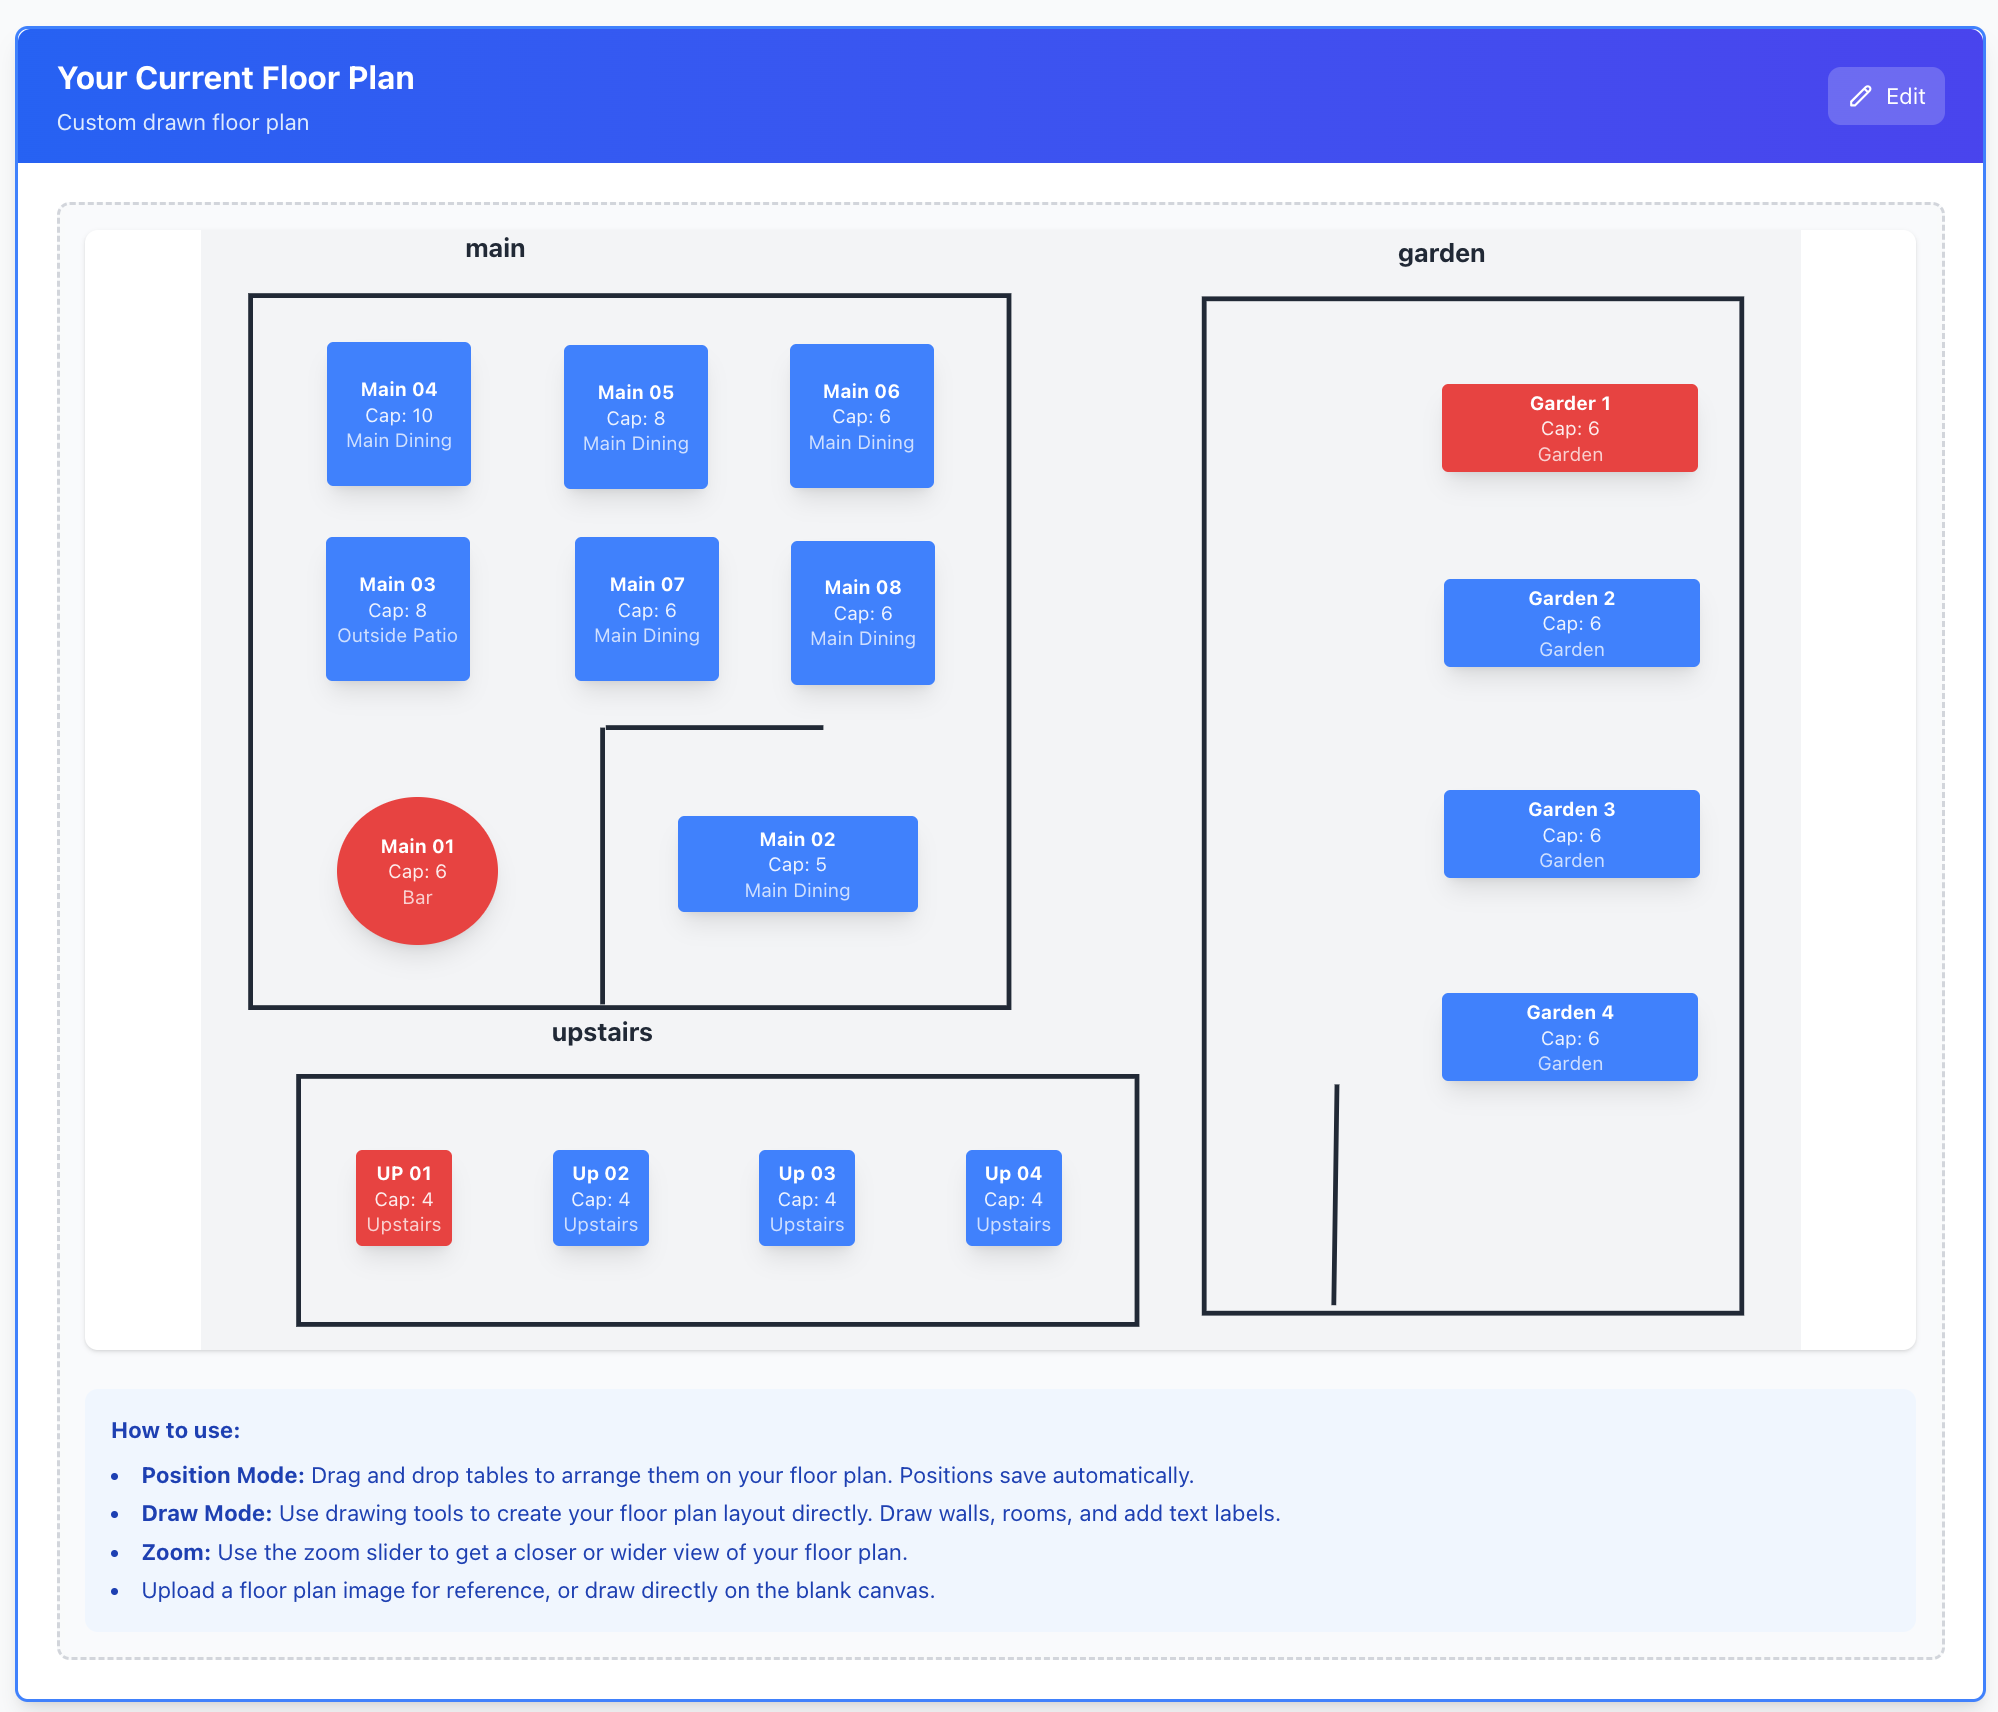
How to use
- Position Mode: Drag and drop tables to arrange them on your floor plan. Positions save automatically.
- Draw Mode: Use drawing tools to create your floor plan layout directly. Draw walls, rooms, and add text labels.
- Zoom: Use the zoom slider to get a closer or wider view of your floor plan.
- Upload a floor plan image for reference, or draw directly on the blank canvas.
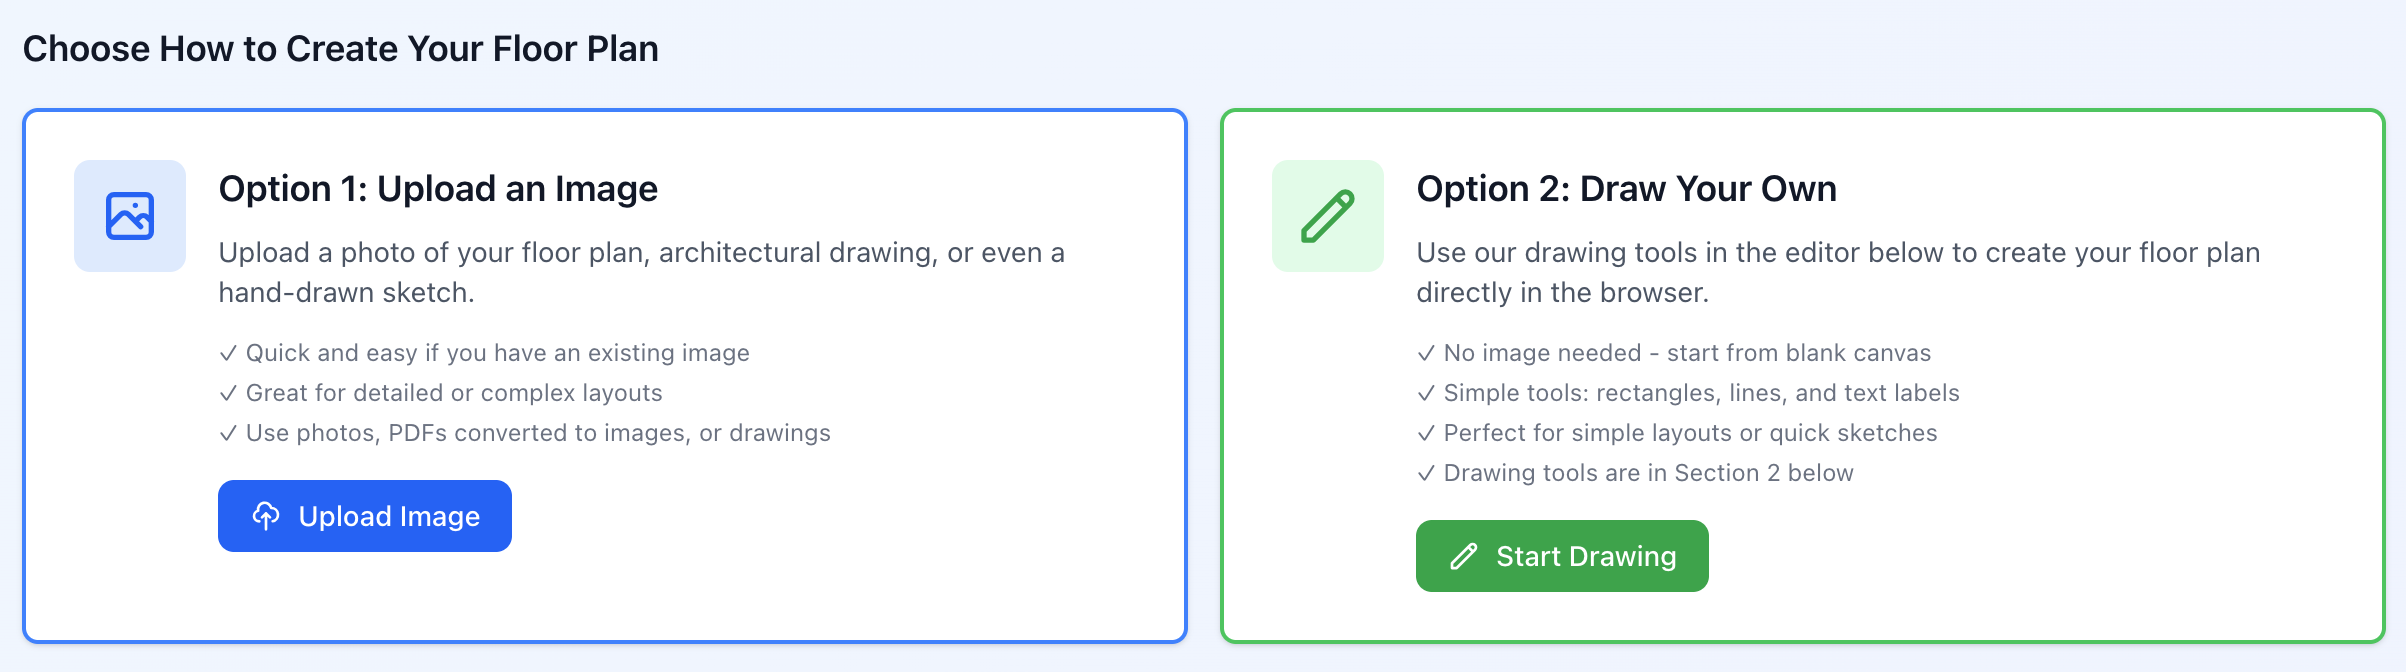
Choose How to Create Your Floor Plan
Example Floor Plans
- https://grabatable.app.test/images/examples/floor-plans/simple-rectangular.svg
- https://grabatable.app.test/images/examples/floor-plans/l-shaped-layout.svg
- https://grabatable.app.test/images/examples/floor-plans/indoor-outdoor.svg
- https://grabatable.app.test/images/examples/floor-plans/multi-room-venue.svg
How to use:
- Position Mode: Drag and drop tables to arrange them on your floor plan. Positions save automatically.
- Draw Mode: Use drawing tools to create your floor plan layout directly. Draw walls, rooms, and add text labels.
- Zoom: Use the zoom slider to get a closer or wider view of your floor plan.
- Upload a floor plan image for reference, or draw directly on the blank canvas.
Upload Floor Plan

Prepare your floor plan image
- Top-down view: A bird's eye view works best for positioning tables
- Include all dining areas: Show where tables aer placed (indoor, outdoor, bar area, etc.)
- High resolution: Use a clear image - minimum 1200x800 pixels recommended
- File format: JPG or PNG format, maximum 10MB file size
- 💡 Tip: You can draw a simple floor plan in any drawing app or take a photo of a hand-drawn sketch!
Draw Floor Plan
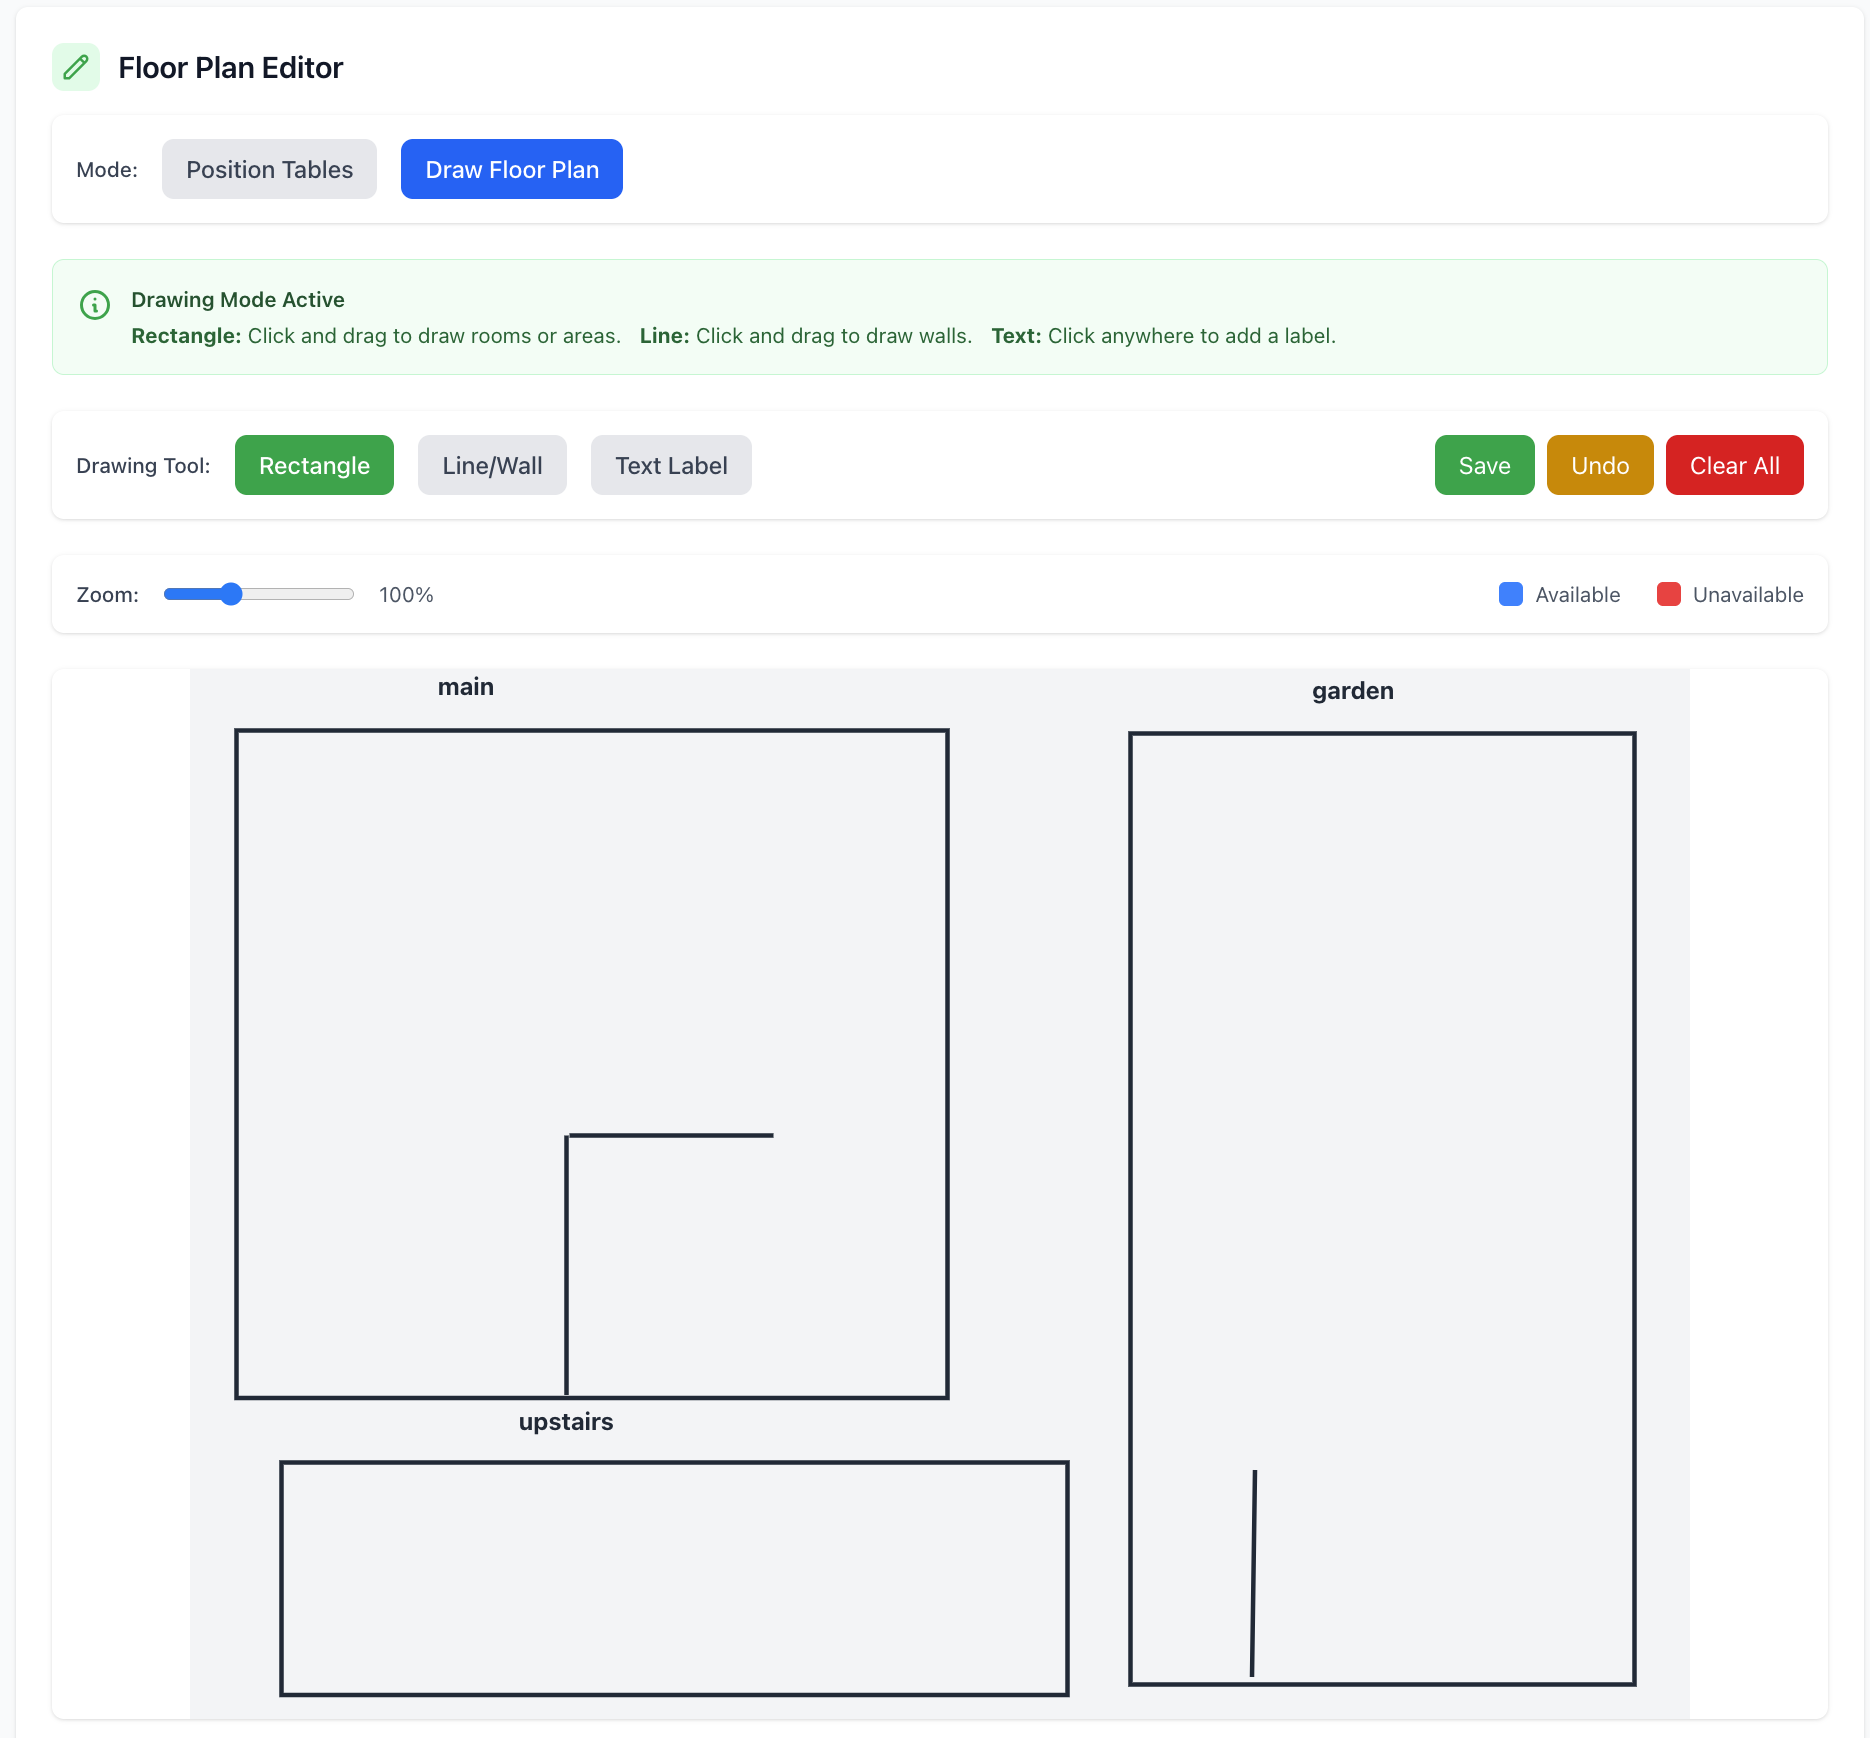
- Use drawing tools to create your floor plan layout directly. Draw walls, rooms, and add text labels
- Use Rectangle tool for rooms/areas, Line tool for walls, and Text tool to label areas (like "Bar", "Kitchen", "Main Dining")
- Rectangle: Click and drag to draw rooms or areas
- Line: Click and drag to draw walls
- Text: Click anywhere to add a label.
Edit Floor Plan
Simply Click On 'Edit'

Floor Plan Editor
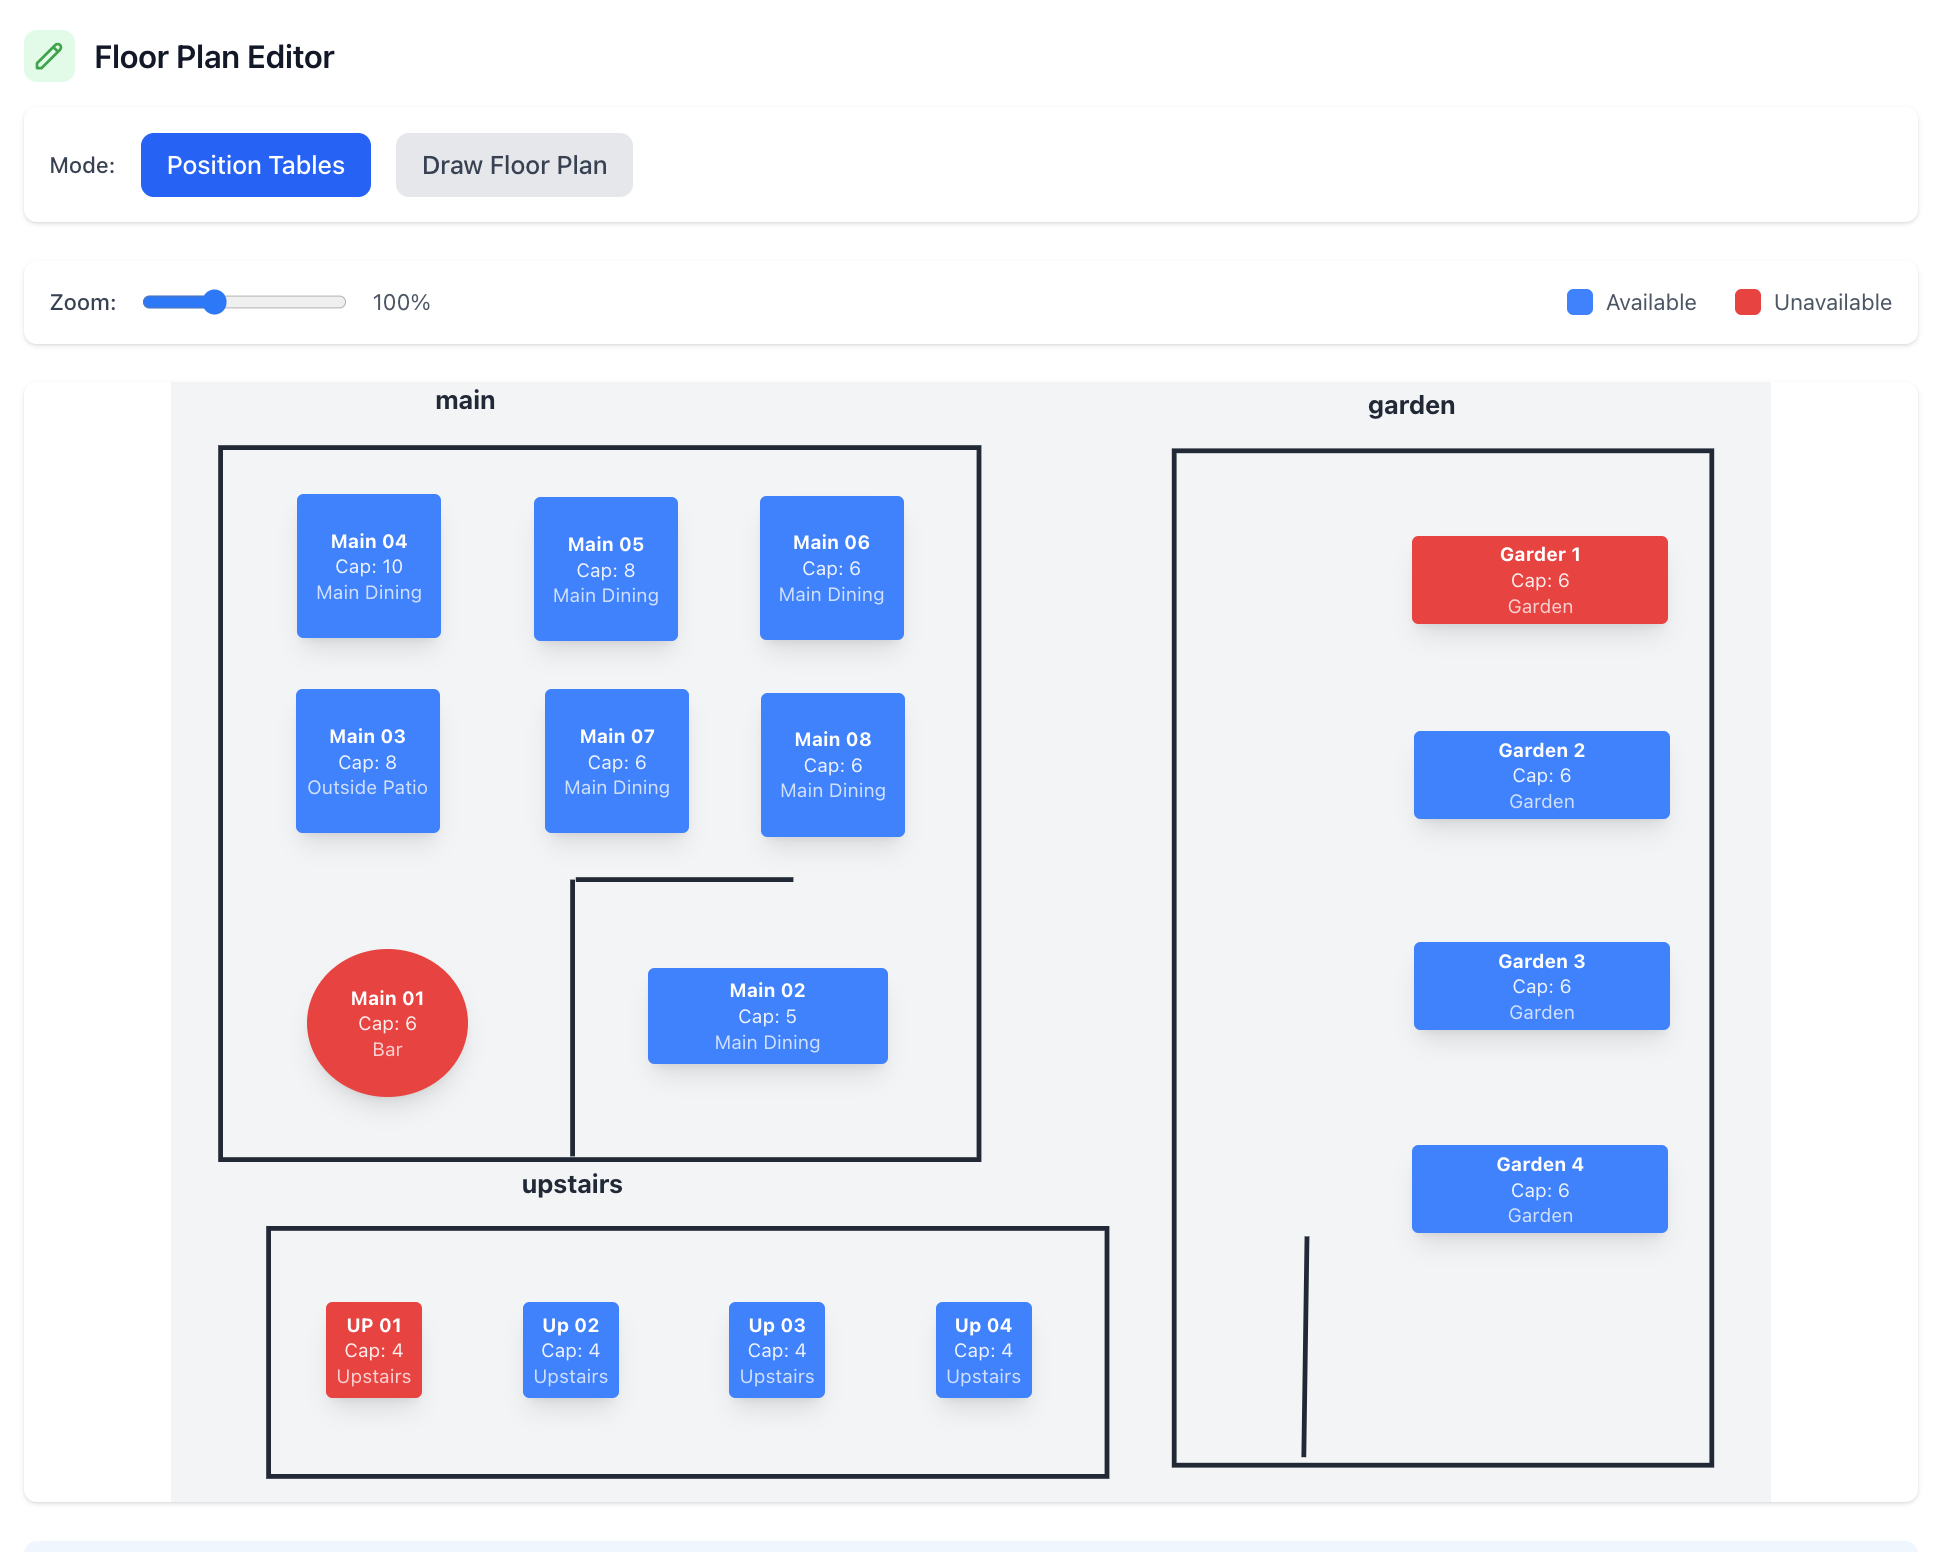
Positon Tables
- Drag and drop tables to arrange them on your floor plan. Positions save automatically
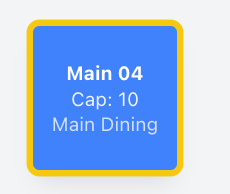
- Click on a table to modify it
- Once selected a yellow border will appear arround the table
Configure Tables
- Select the table shape
- Set the width in PX
- Set the height in PX
- Or, select a quick size
- Or, select a long table size
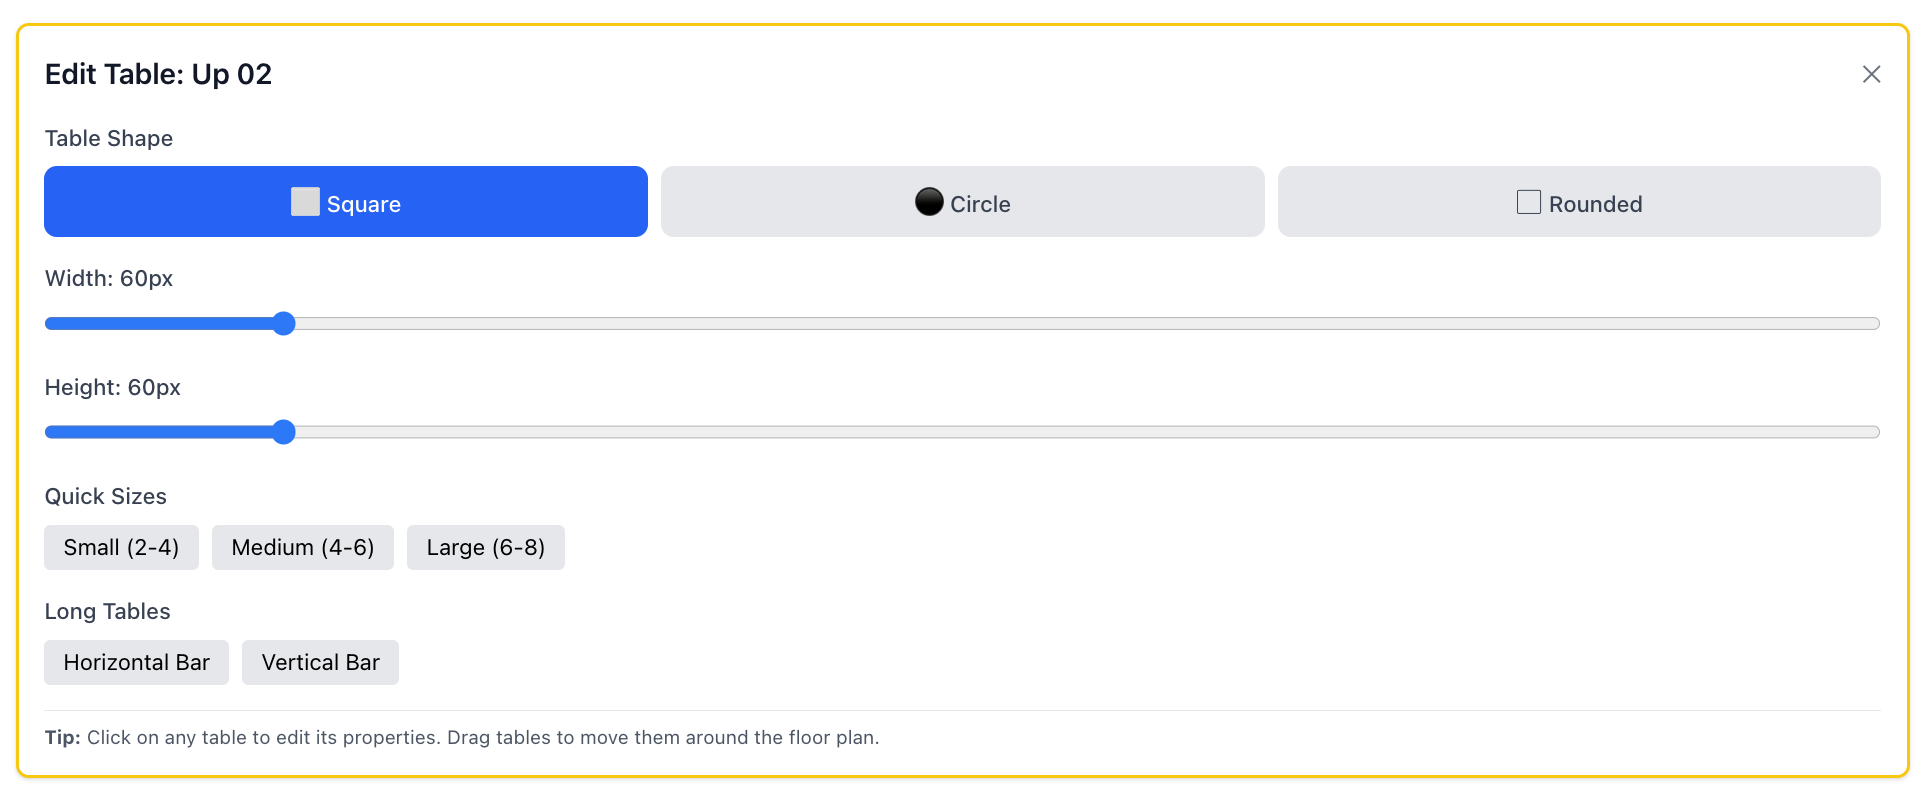
Once configured, you can move the table on the floor plan as requried.
Tips
- Keep walkways clear for staff flow
- Mirror the real-world layout as closely as possible
Next Steps
- Add or edit tables in Tables
- Update venue info in Edit Details